A finished basement can add real living space without adding square footage. It can also become the most frustrating part of your home if moisture and planning are handled the wrong way. The best basement remodels feel warm, dry, and intentional. They are built around how the space will actually be used, and they start with the unglamorous basics: water management, airflow, insulation, and a clear scope.
This guide is designed for Suffolk County homeowners who want a practical start-to-finish plan before they hire a contractor or buy materials. If you want a pro to evaluate your basement and recommend the right approach, begin with basement remodeling services so the project is scoped correctly from day one.
Step 1: Define the purpose of the basement (so the layout makes sense)
Most basement projects go sideways because they start with finishes instead of function. Start by deciding what the basement is supposed to do for your household.
Common basement “use cases” that plan well
- Family room or media space
- Home office or study space
- Guest room or in-law style space
- Kids’ play area with durable surfaces
- Home gym with rubber flooring and airflow
- Storage plus a cleaner utility zone
Questions that prevent layout regrets
- Who will use the space most often?
- Will it be used daily or only on weekends?
- Do you need quiet zones and loud zones?
- Do you want a separate room or an open plan?
- What do you want to do with laundry, utilities, and storage?
When you can describe the basement in one sentence, the layout becomes much easier to design.
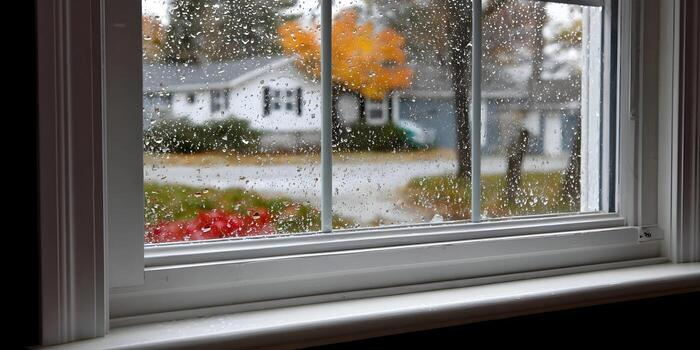
Step 2: Treat moisture as the foundation of the entire project
In basements, moisture is not an “if.” It’s a “how.” The goal is to control it so you don’t end up with musty smells, peeling paint, warped flooring, or mold.
The three types of basement moisture problems
- Bulk water: Actual leaks, seepage, or puddles after rain
- Vapor: Humidity moving through concrete walls and floors
- Condensation: Warm air hitting cool basement surfaces
Simple warning signs to look for
- Musty odor that returns after cleaning
- White powdery residue on concrete (efflorescence)
- Rusting metal near foundation walls
- Peeling paint or bubbling on walls
- Damp carpet edges or warped baseboards
- Water staining after storms
Moisture control basics that should be in your plan
- Make sure gutters and downspouts move water away from the foundation
- Maintain proper grading so water slopes away from the home
- Consider dehumidification as a standard baseline
- Avoid trapping moisture behind finishes without a plan
If your basement has a history of water, your finish choices must reflect that reality. A good contractor plan will address it directly.
Step 3: Decide whether the basement needs a “utility-first zone”
Most basements include a mechanical area that needs access and airflow. Planning for it early avoids awkward layouts later.
Utility zone planning tips
- Keep equipment accessible, not boxed in
- Plan clear pathways to shutoffs and panels
- Consider sound reduction if the space is near living areas
- Separate storage from finished walls to reduce moisture problems
Step 4: Create a layout that feels bright and usable
Basements feel better when you intentionally design for light and flow.
Layout moves that improve comfort
- Create a natural “main area” where people gather
- Keep walkways wide and simple
- Use partial walls or half walls where full walls make it feel cramped
- Consider built-in storage to reduce clutter
- Plan TV and seating placement before you run outlets
If you want a bedroom or a guest space
Plan for:
- Privacy and noise control
- Closet space, if you want it to feel legitimate
- Proper lighting and ventilation
- Egress requirements, if applicable
Step 5: Plan lighting as a system, not a last-minute add-on
Lighting is one of the biggest factors in whether a basement feels “finished” or “below ground.”
A practical basement lighting plan
- Recessed lights for general lighting
- A few feature lights for warmth and style
- Task lighting for office corners or reading areas
- Lighting that avoids harsh shadows near walls
Small upgrades that have a big impact
- Dimmer switches for flexibility
- Warm light temperature for comfort
- Lighting zones so you do not have to light the whole basement at once
Step 6: Choose insulation and wall systems based on how basements behave
Basements are different from above-grade rooms. Insulation and wall systems must handle moisture and temperature swings properly.
What do you want from the wall system
- Moisture resilience
- Consistent comfort across seasons
- Reduced musty smells
- Less chance of hidden mold behind finishes
Common planning mistakes to avoid
- Finishing walls tightly against a damp foundation without a moisture plan
- Choosing materials that trap water where you cannot see it
- Skipping dehumidification while adding soft finishes
If your contractor cannot explain how the wall system handles moisture, you should push for clarity.
Step 7: Flooring choices that work in real basements
Flooring is where moisture problems show up first, so choose based on your basement’s behavior, not only looks.
Common basement flooring options
- Luxury vinyl plank for durability and moisture tolerance
- Tile for high moisture tolerance and easy cleaning
- Engineered options designed for below-grade use
- Carpet tiles in dry basements where comfort matters
Flooring decisions should consider
- How often does the basement get humid
- Whether you have any history of seepage
- Whether you want softer surfaces for kids or workouts
- How do you plan to manage spills and cleanup
Step 8: Ventilation, temperature, and dehumidification planning
A finished basement must feel comfortable year-round. That usually means treating air quality as part of the scope.
Comfort checklist
- Identify how the basement will be heated and cooled
- Plan for airflow to avoid stale corners
- Consider a dehumidifier setup if humidity is common
- Avoid blocking vents with furniture or walls
Humidity control is not optional if you want finishes to last.
Step 9: Build the scope so contractors can quote accurately
Basement finishing can mean anything from “paint and carpet” to “full living space.” The clearer your scope, the more predictable the project.
Define the rooms and features
- How many rooms are being created?
- Is there a bathroom, wet bar, or kitchenette?
- Do you need storage built-ins?
- Are there new outlets, lighting zones, or internet wiring needs?
Define what you want done to the utilities area
- Enclosed or open?
- Storage placement?
- Sound control?
Define the finish level
- Basic, durable finish
- Premium, design-forward finish
- Family-friendly, high-wear finish
Identify possible “surprise zones.”
- Visible foundation cracks
- Past water entry points
- Old insulation or framing that needs replacement
Good scopes include a plan for surprises rather than pretending they will not happen.
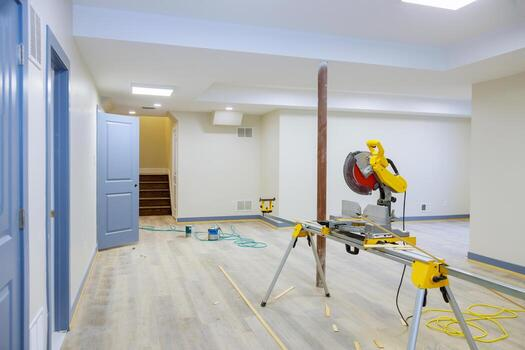
Step 10: What to expect during the project (start-to-finish)
A basement finishing project typically follows a predictable path.
Typical phases
- Planning and layout finalization
- Moisture control steps (if needed)
- Framing and rough-in work
- Insulation and wall system installation
- Drywall and finishing
- Flooring install
- Trim, paint, and final details
- Walkthrough and punch list
The biggest delays usually come from scope changes, hidden moisture issues, or last-minute decisions. Making key decisions early helps a lot.
A helpful related read before you hire
If you’re deciding whether to DIY certain parts or bring in a pro, this post helps frame why local contractor coordination matters: the benefits of hiring a local contractor for home projects.
FAQ
How do I know if my basement is “dry enough” to finish?
If you have puddles, damp walls, or water after storms, you need moisture control first. Even in basements without leaks, vapor and humidity can still damage finishes. A good plan includes dehumidification and moisture-resilient materials.
What’s the biggest mistake homeowners make when finishing a basement?
Skipping moisture planning. Finishes can look great at first, but humidity and vapor can cause odors, warping, and mold if the system is not designed for below-grade conditions.
Do I need a dehumidifier in a finished basement?
Many Suffolk County basements benefit from one, especially in humid seasons. It helps protect flooring, trim, and air quality, and it makes the basement feel more comfortable.
What flooring works best in basements?
It depends on the moisture risk. Many homeowners choose durable options like vinyl plank or tile for easier maintenance. Softer surfaces can work if the basement stays consistently dry and humidity is controlled.
Can I add a bedroom to my basement?
Potentially, but bedrooms often require considerations like proper egress, privacy, and ventilation. Planning these early avoids expensive changes later.
How do I keep a finished basement from feeling dark?
Use layered lighting, keep the layout open where possible, choose lighter finishes, and plan lighting zones. Good lighting design makes a basement feel like real living space, not an afterthought.
Next step: turn your plan into a quote-ready scope
If you’re in Suffolk County and want a basement that stays dry, comfortable, and usable, the most valuable step is a professional evaluation of moisture behavior, layout goals, and the right wall and flooring system for your space.
Request a quote here: contact Doug’s Painting & Contracting and include what you want the basement to be used for, any history of water or musty smells, and a few photos of the foundation walls, corners, and utility area. That helps the team recommend a plan that lasts.


